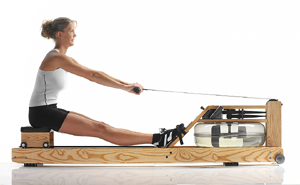
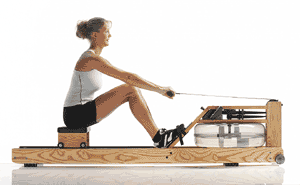
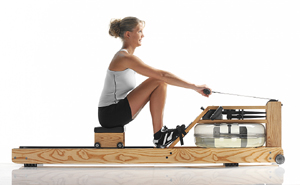
About Technique

Common Technical Faults

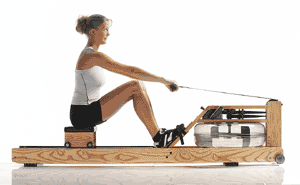
Too many people the rowing stroke is an unnatural action. However, with the correct technical instruction most people can master rowing and enjoy its physiological benefits. We have outlined a number of common faults which as an instructor you need to be able to recognize and correct.

Please read through all sections (tabs) to the left before moving on to the next lesson

Short Stroke

Fault: This fault is when the users rows with not reaching or compressing to their full potential. Stroke length will vary amongst users, length is the reach and compression a user can obtain when rowing comfortably. Many users shorten their stroke when they start to get tired.

Tell tale signs include:

High stroke rates at an easy intensity, anything above 26spm for steady state rowing is usually rowing with short strokes.

Tips for correction:

    • Use the Ratio and Rhythm feature on the monitor – hold a 1:2 ratio
    • Practice the Slow Slide Drill

Poor Ratio & Rhythm

Fault: Poor ratio and rhythm occurs when you are eager to get to the next stroke and not taking the time to complete the Drive, or reach the Release position and forget to take a longer time sliding forwards up the slide on the Recovery.

Tips for correction:

  • Use the Ratio and Rhythm feature on the monitor – hold a 1:2 ratio
  • Practice the Slow Slide Drill
  • Ratio and rhythm are important for sustaining a smooth powerful stroke during an aerobic workout.
  • The rowing stroke is not rushed, the recovery time allows the boat to run therefore achieving maximum distance each stroke.
Toes Lifting

Fault: Toes lift up off the footboard on the Release, leads to loosening foot straps.

Tips for correction:

  • Keep the balls of the feet in contact with the footboard at all times.
  • At the Release position focus on pointing your toes into the footboard.
  • At the end of the Drive phase and in the Release position engage your core and hold your legs straight for a fraction of time, then rock over by pivoting at the hips and transfer your body weight forwards.
Bent Arms

Fault: Bending the arms too early in the drive phase.  Or not straightening the arms properly during the Rock Over phase

Tips for correction:

  • Focus on the feeling of hanging off the handle as you drive with the legs.
  • During the Rock Over phase move the hands away from the body and reach forwards with straight arms.
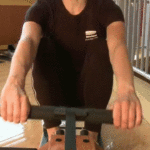
Early Knees

Fault:Raising the knees too early, as the name suggests, occurs when the user raises the knees before the hands have moved beyond the knees. The hands should move away from the body and over the knees before the knees break. This is known as the Rock Over phase.

Tell tale signs include:

• The hands fall in behind the knees

• The hand height varies up and down

Tips for correction:

  • Focus on moving the hands away from the body and rocking the torso over before the knees bend (feel the stretch in the hamstrings).
  • Focus on finishing the stroke with the hands away and torso over and not at the Release.
  •  Let the knees follow the handle up the slide on the Recovery.
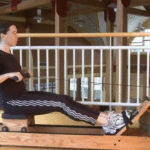
Knees Out

Fault: Rowing with the knees ‘falling’ out to the side.

Tips for correction:

  • Try to keep the knees approximately 1-2 fist widths apart.
  • When rowing ensure your knees are positioned inside of your elbows.
  • Body shape plays a role; if you are unable to do any of the above to correct the fault, aim to row with a slightly shorter slide length.
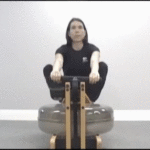
Elbows Out

Fault: The user pokes their elbows out as they draw the handle in to the body. This can often be associated with drawing too high.

Tips for correction:

  • Focus on drawing the handle to the second from bottom rib.
  • Focus on drawing the elbows behind the body.
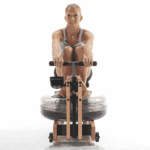
High Draw

Fault:  Drawing too high – to under chin or forehead height. This is often associated with elbows out fault.

Tips for correction:

  • Draw the handle to the middle of the torso, about the second from bottom rib.
  • Focus on drawing the handle to the second from bottom rib.
  • Focus on squeezing the shoulder blades together.
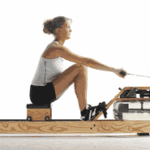
Low Hands

Fault:  Low hands, as the name suggests, occurs when the user carries the hands too low on the way forward. The hands should move away from the body and back to the Catch in a horizontal line.

Tell tale signs include:

  • The hands follow the profile of the legs.
  • The Catch position is short and the user is rowing with a shorter stroke.

Tips for correction:

  • Draw the handle to the middle of the torso, about the second from bottom rib.
  • Focus on drawing the handle to the second from bottom rib.
  • Focus on squeezing the shoulder blades together.
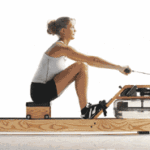
Hunched Release

Fault:  Occurs when the user is hunched over at the Release, this indicates poor posture and may make the user susceptible to back injuries.

Tell tale signs include:

  • The back is exaggeratedly curved at the Release.
  • The head is down at the Release.
  • The shoulders are in front of the hip at the Release.

Tips for correction:

  • Focus on strong posture and sitting tall.
  • Focus on keeping the head up and eyes forwards.

Hunched Catch

Fault:  This occurs when the user is hunched over at the Catch position. Hunched catches show bad posture and may make the user susceptible to back injuries.

Tell tale signs include:

  • The back is exaggeratedly curved at the catch.
  • The head is down at the catch.

Tips for correction:

  • Focus on strong posture and sitting tall.
  • Focus on keeping the head up and eyes forwards.
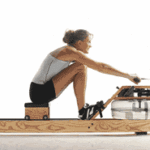
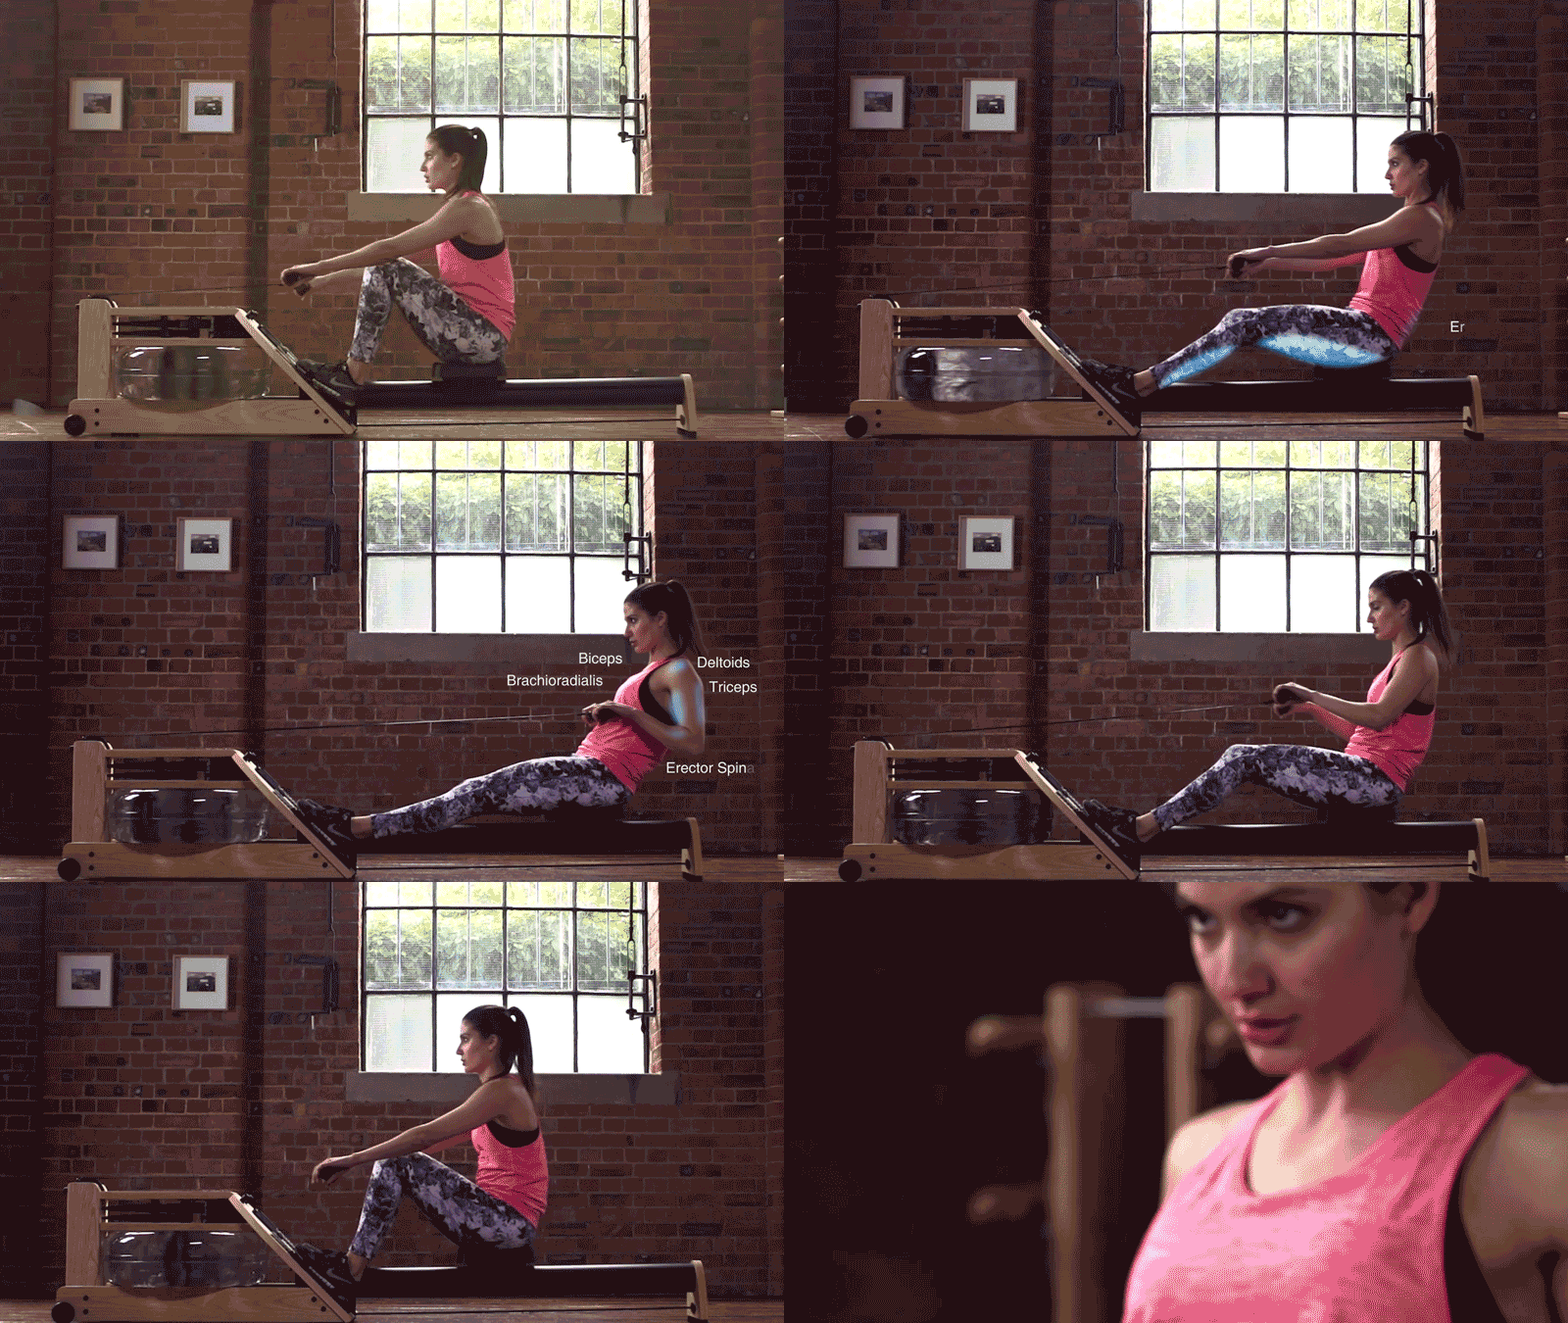
Exaggerated Lean Back

Fault:  Occurs when the user over exaggerates the use of the torso through the early part of the Drive and at the Release.

Tell tale signs include:

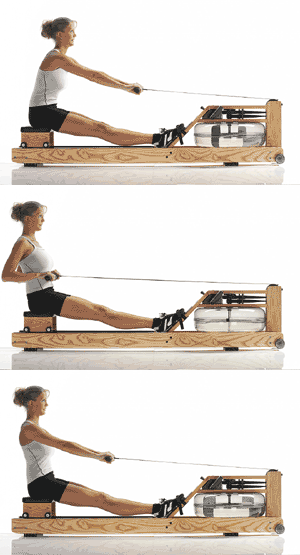
  • The body leans too far back as seen in the animation above.
  • The torso is used to draw the handle back rather than using the legs and arms.

Tips for correction:

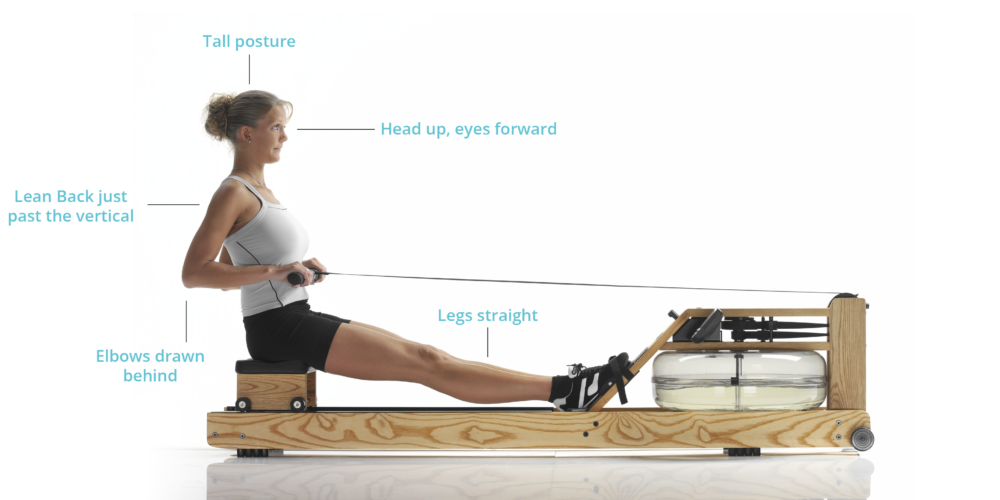
  • Focus on sitting tall and just past the vertical at the end of the Drive in the Release position.
  • Focus on using the legs for the first part of the Drive and finishing with drawing in the handle to the body.
  • Focus on sitting tall yet relaxed throughout the rowing stroke.
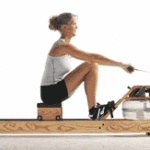
Seat Shoving

Fault:  The seat shove occurs when the drive of the legs is not well connected to the handle, this is usually due to poor posture or strong core which is the connection of the legs and arms.

Tell tale signs include:

  • The seat moves independently of the handle.
  • The body angle closes as the legs are drive back.

Tips for correction:

  • Focus on the seat being connected to the handle – the handle moves when the seat moves.
  • Focus on not closing the body angle but maintaining the same torso position through the beginning of the Drive.
  • Hold a strong core as you Drive with the legs.
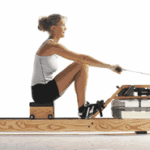
Bent Wrists Rowing

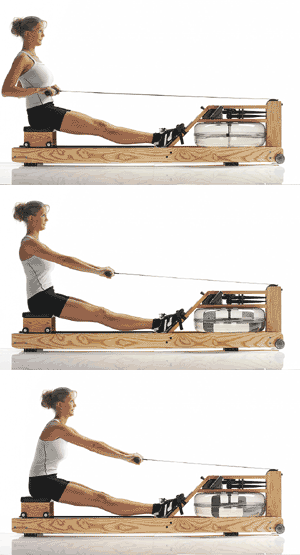
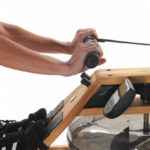
Fault:  Bent wrists, as the name suggests, occurs when the user cocks the wrist either up or down. This can occur either in the Catch position or the Release position. The wrists should remain flat (as seen in the last picture) and the fingers simply hooked over the handle.

Tips for correction:

  • Focus on drawing the handle to the second from bottom rib.
  • Focus on keeping the elbows close to the body as you draw the handle in.
  • Focus on keeping the forearms horizontal.
  • Use all of the upper back muscles (squeeze the shoulder blades together) to draw the handle in at the Release.
date:  Aug 22, 2017 comments:  Comments Off on Common Technical Faults
by:  [email protected] category:  Uncategorized Read More

Technique Calls

These are some examples of calls to re-emphasize correct rowing technique.

The Drive

• Support the spine – back straight

• Even push away on the footboard

• Hang off the handle

• Straight arm / level arm draw

• Accelerate the handle

• Try to allow the knees and arms to finish the drive at the same time

The Recovery

• Keep the hands moving at all times especially around the turn at the release

• Hands away, body over before knees break

• Hold the knees down

• Let the knees follow the handle

• Slow up the slide, let the boat run (listen to the sound of the water)

• Curl slowly up the slide like a spring ready to unwind, but stay relaxed

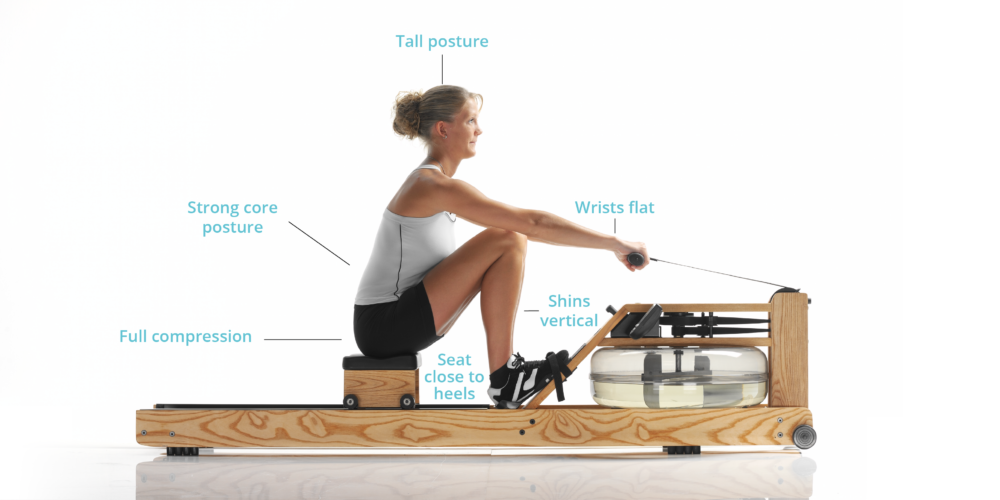
• Try to get the seat close to your heels for full range of motion

• Sit up (at all times)

• Hands away, then the body, then the slide (or hands, body, slide)

Other

• Keep the movement flowing (don’t stop)

• Tap it along

• Lift and run

• Relax and draw

Some of these calls can be confusing if not having rowed in a boat. If you have any queries, please do not hesitate to contact us.

date:  Aug 22, 2017 comments:  Comments Off on Technique Calls
by:  [email protected] category:  Uncategorized Read More

Technique Drills

Technique drills break the stroke down into constituent parts to separate out each movement. Four drills (tabs on the left) are particularly useful, please review before moving on to the next lesson:

Fixed-seat (Arms & Body Only) Rowing Drill

The fixed-seat or arms and body only rowing drill ensures there is no leg action when moving from the release position through the rocked over phase to the rocked over position.

This drill improves smoothness of the transition from drive to return. It is also very helpful in correcting and improving posture by rocking from the pelvis and not bending from the lower back.

Instructor Tip: Stopping the drill at the rocked over position Check Point encourages the hands to flow smoothly throughout the transition from the release position through the rock-over phase. It also allows the user to concentrate on the body rock over from the hips and not the lower back.

Catch Drill

The catch drill isolates the leg action at the beginning of the drive.

Practice shoulder relaxation and leg-back co-ordination by moving back and forth between the catch position and the beginning of the drive.

Concentrate on feeling the connection of the paddle in the water as it “locks on”, with the arms and shoulders staying still as the legs start to drive down. In this phase of the stroke, the legs do everything, so the body angle should stay the same and the arms should be straight throughout the exercise.

This drill can be tricky to teach.

Slide Drill

Slide drill commences with arms only rowing, then fixed-seat or arms & body only rowing, then the slide (or legs) are gradually included, beginning with half slide (half leg compression)) and finally full slide (full leg compression). This drill is particularly useful for teaching people correct technique in steps.

Arms Only Rowing: Arms Only Rowing drill is rowing using only the arms, the legs are kept in a straight position (knees can be bent slightly if more comfortable) and the body remains still.

Fixed Seat or Arms & Body Only Rowing: as with arms only rowing above, the legs are kept straight and the body is rocked over from the pelvis.  Only the upper body and arms are used.

Half slide: at the rocked over checkpoint, the knees break and the legs are allowed to compress to about half slide (the recovery checkpoint). The drive is commenced from the recovery checkpoint

Full slide: concentrating on maintaining the above sequence of movement, the legs compress fully reaching the catch checkpoint.

Slide work combines the different slide length drills together so that the user gradually builds up to full side and then builds down to no slide.  This embeds the elements of technique into the full slide action. Practicing each slide length for a minute or so and then returning to full-range rowing enables you to feel the effect of each drill on your co-ordination.

An examples of using the slide drill when warming up is:

  • 20 strokes at no slide
  • 20 strokes at half slide
  • 20 strokes at full slide
  • 20 strokes at half slide
  • 20 strokes at no slide

Slow Slide Drill

The slow slide drill entails a slow (to very slow) return to the catch with the intention of over emphasizing relaxation and posture during the recovery. The slow slide drill improves slide control, enhancing ratio and rhythm.  The ratio of work to recovery can be increased to 1:3 or 1:4.

Instructor Tip:  Over emphasizing the slowness of the recovery can assist in the perception of control.

date:  Aug 22, 2017 comments:  Comments Off on Technique Drills
by:  [email protected] category:  Uncategorized Read More

Instruction Technique – Focus Points

Focus points are areas of focus for each phase or position of the rowing action. They may take the form of calls or simple instructions. These points can be used either during warm up, workout or cool down. They may be particularly useful during Check Point drills.

Release Position Focus Points

Technique-focus-points-01

Rocked Over Position Focus Points

Technique-focus-points-02

Recovery Phase Focus Points

Technique-focus-points-03

Catch Position Focus Points

Technique-focus-points-04

Drive Phase Focus Points

Technique-focus-points-05
date:  Aug 22, 2017 comments:  Comments Off on Instruction Technique – Focus Points
by:  [email protected] category:  Uncategorized Read More

Technique Check Points

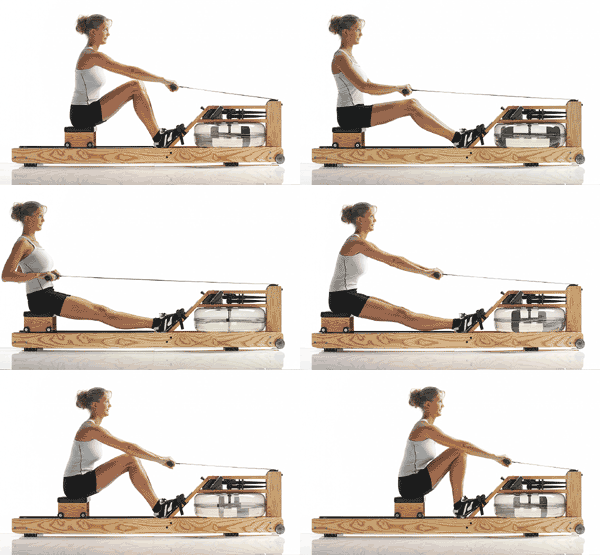
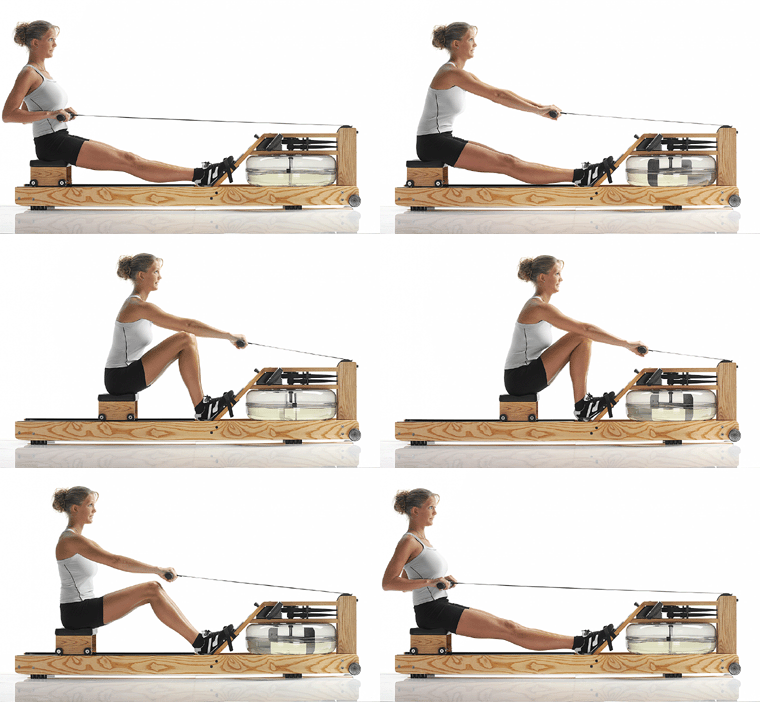
For ease of instruction the rowing stroke may be paused at several steps in order to check body position and technique. The positions where one pauses are known as Check Points. Remember, the rowing stroke itself is a continuous, smooth and flowing action.

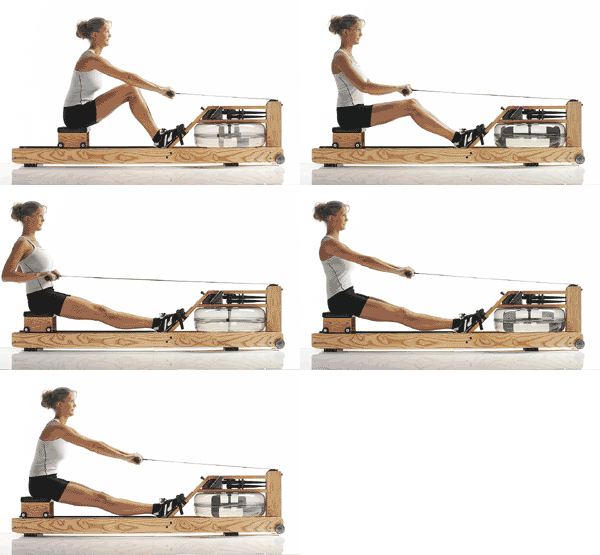
At each Check Point use focus points (in the next few slides) to reinforce technique. For example, at Check Point One ensure that you are sitting tall, shoulders relaxed, handle drawn into the chest.


Check Point One 

The Release

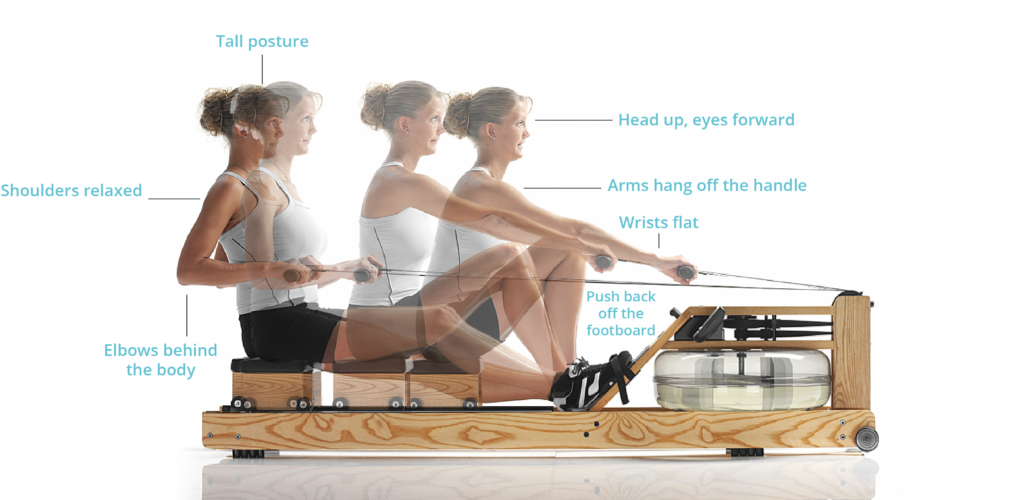
Check: Legs straight, feet in contact with footboard, sitting tall, head up, eyes forward, shoulders relaxed, elbows behind, handle drawn to chest and wrists flat.


Check Point Two 

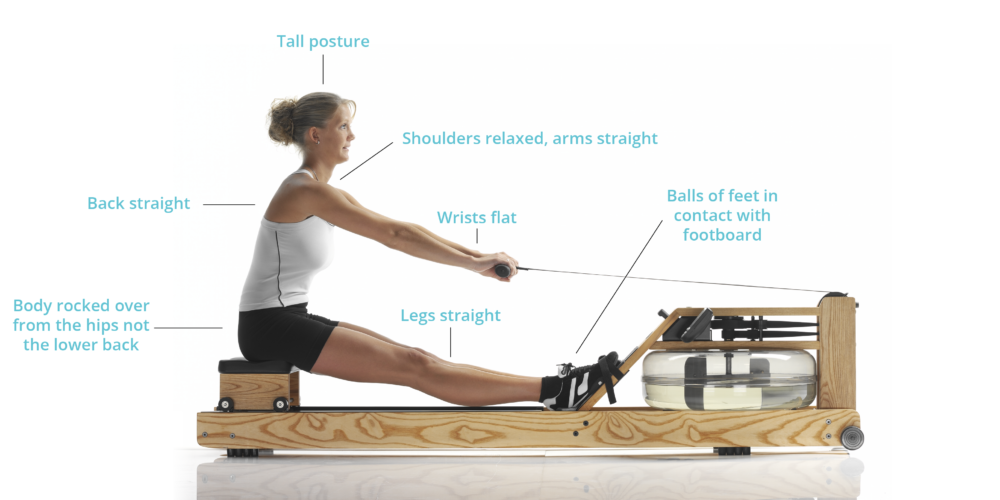
The Rock Over

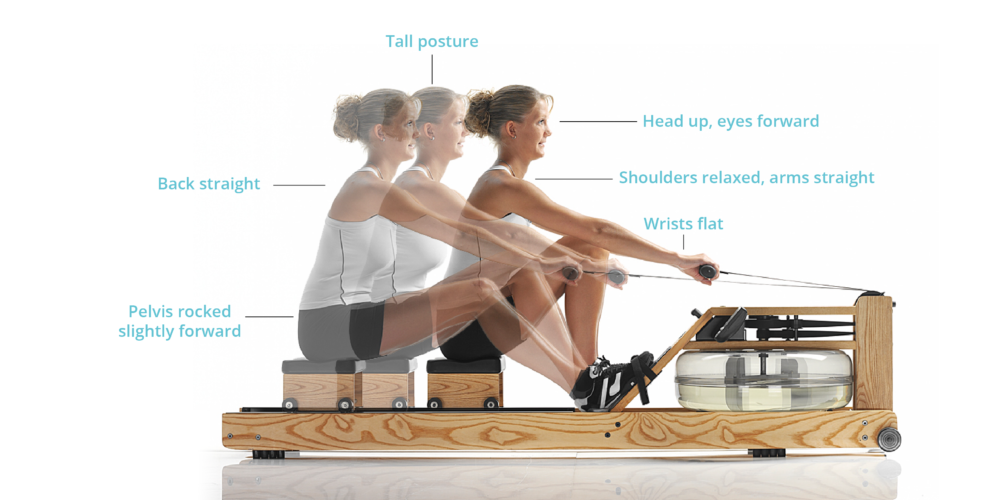
Check: Body rocked over from the pelvis not lower back, arms straight, shoulders relaxed, head up, eyes forward, legs straight, feet in contact with footboard and wrists flat.


Check Point Three 

The Recovery (half slide position)

Check: Body maintains rocked over from the pelvis not lower back, arms straight, shoulders relaxed, head up, eyes forward, legs bent to half slide position, feet in contact with footboard and wrists flat.


Check Point Four 

The Catch

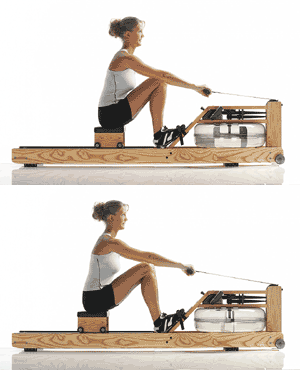
Check: Body again maintains the rocked over position, arms straight and in full reach, shoulders relaxed, head up, eyes forward, legs fully compressed, feet in contact with footboard and wrists flat.

date:  Aug 22, 2017 comments:  Comments Off on Technique Check Points
by:  [email protected] category:  Uncategorized Read More

Instructing Rowing Technique

Blending the elements of rowing into the rowing action is the art of rowing technique instruction. Here we cover several methods of instruction. While none is preferred to the other, you will note that individuals will respond differently to various forms of instruction. Having a broad range of tools will assist in getting your message across.

Technique Check Points

The positions through which the body moves. This breaks down the stroke into its constituent elements, assists instruction and helps develop co-ordination.

Focus Points 

The points of focus for each of the phases and positions of the rowing stroke. This assists in honing the rowing action, adding movement to the Check Points and making the action more fluid.

Technique Drills

Assist in coordinating the Check Point and Focus Point instruction and smooth the action into one flowing stroke.

Technique Calls

Ways of expressing the desired technique element which may assist instructors to teach correct rowing style.

date:  Aug 22, 2017 comments:  Comments Off on Instructing Rowing Technique
by:  [email protected] category:  Uncategorized Read More

The Rowing Action

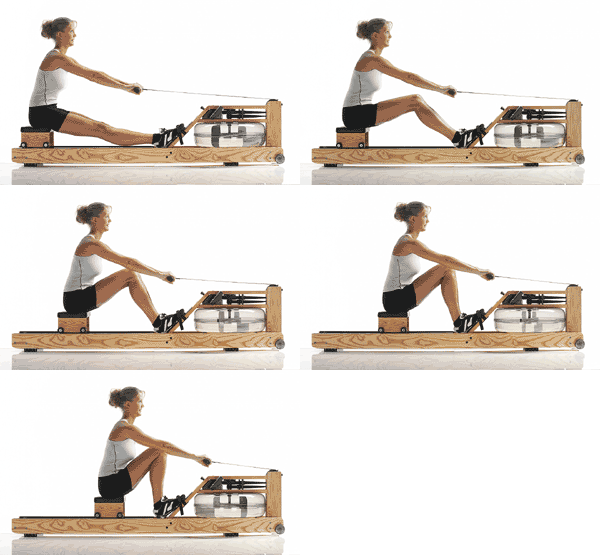
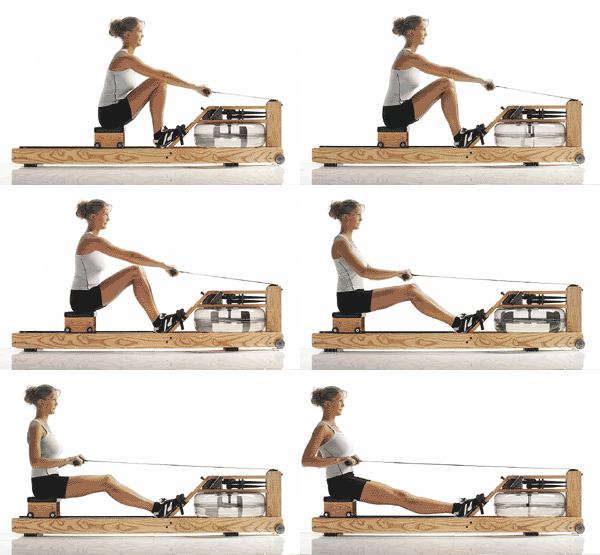
As discussed previously the rowing action should not be considered to have any distinct parts but be one smooth, flowing, uniform action. However for instruction purposes it can help to break the rowing action into its three phases and three corresponding positions.

Please read through all steps (tabs) to the left before moving on to the next lesson

Position 1 – The Release Position

The release position is at the end of the drive phase. The release is where active propulsion of the boat ceases and the oar is removed from the water. This is not the end of the stroke but simply the change in direction of the handle.

Phase 1 – The Rock Over Phase

The rock over phase begins at the release position and ends at the rock over position. The arms extend and the torso rocks over from the pelvis (not the lower back).

Position 2 – The Rocked Over Position

The rocked over position occurs at the end of the rock-over phase. The arms are extended and the torso is rocked over adopting the upper body positioning of the catch.

Phase 2 – The Recovery Phase

The recovery phase begins at the rock-over position and ends at the catch position. No active propulsion takes place at this point. There is no movement of the upper body and torso during the recovery phase, just the legs. All torso and upper body positions have been set at the rocked over position.

Position 3 – The Catch Position

The catch position is the position of the body at the end of the recovery phase and the beginning of the drive phase. The body is coiled like a spring, ready to release.

Phase 3 – The Drive Phase

The drive phase is the work phase of the rowing action beginning at the catch position and ending at the release position.

date:  Aug 22, 2017 comments:  Comments Off on The Rowing Action
by:  [email protected] category:  Uncategorized Read More

Speed vs. Stroke Rate

Speed v. Stroke Rate

A common misconception with rowing machine users is that the faster you move up & down the slide the quicker your ‘speed’. Speed in rowing is referred to the speed of the boat through the water, not the person moving up & down the slide on the seat which is known as stroke rate.

Speed should increase with an increase in stroke rate but rowing machine users tend to row at higher stroke rates with a low speed. As an instructor use the speed shown on the WaterRower monitor to instruct users to try and obtain a high speed (shown in meters per second, miles per hour & split times), at a low stroke rate (18-22spm).

Synchronization or Timing

Synchronization or timing relates to the co-ordination of the rowing action between each member of a crew.

Co-ordinating technique so that everyone does the same thing at the same time improves efficiency and hence speed, and is essential to on-water elements such as boat balance.

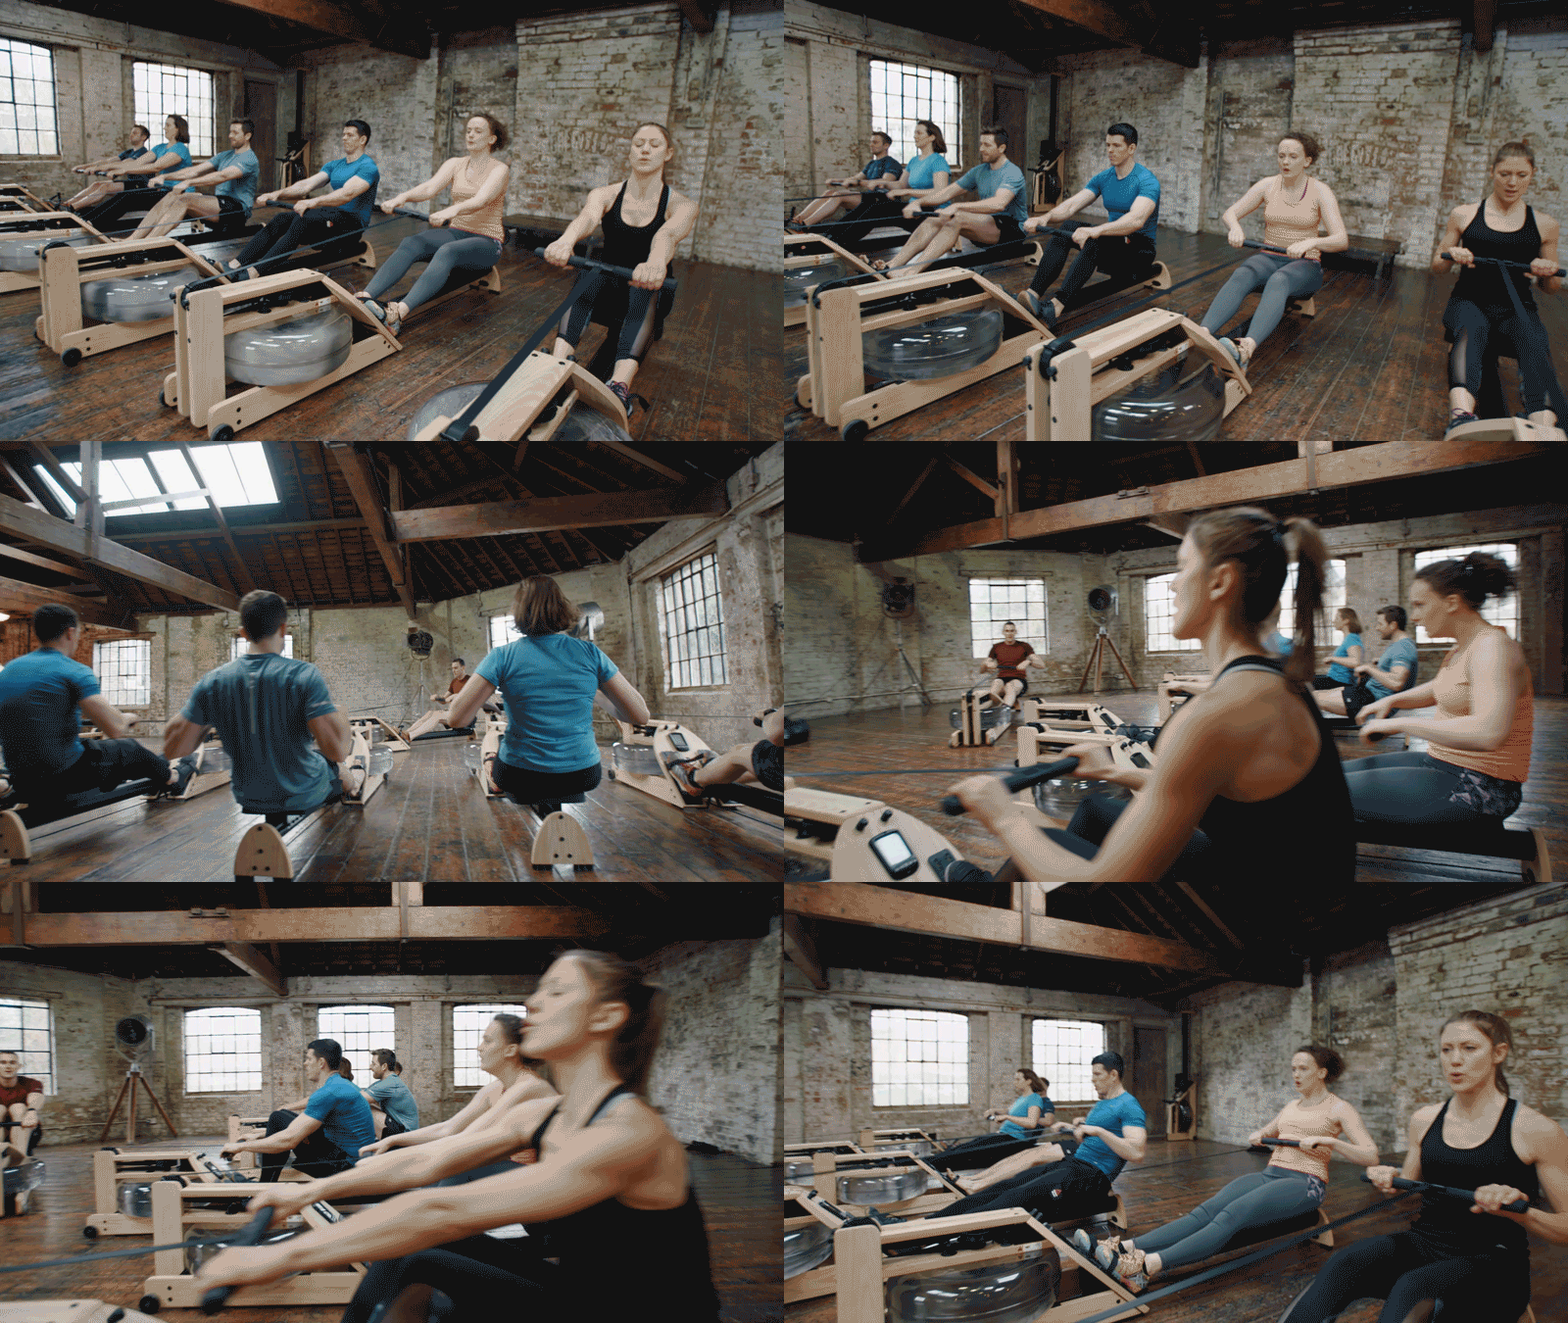
In a group rowing class, timing is functional and aesthetic. Encouraging correct synchronization between group rowing participants will enhance the feeling of rowing in a real crew boat.

WaterRower-Group-Exercise-Video-small
date:  Aug 22, 2017 comments:  Comments Off on Speed vs. Stroke Rate
by:  [email protected] category:  Uncategorized Read More

Rhythm and Ratio

Ratio is the relationship between the work phase (the drive) and the recovery phase (rock-over and return) of the rowing action.The correct ratio in rowing is 1:2 – spending twice as long to “recover” and come back up the slide as was spent in driving the legs down. When the correct ratio is achieved, there is a satisfying rhythm to the continuous flow of the rowing stroke.

A common problem in rowing is that people “rush” up the slide, meaning that the ratio of drive to return is more one to one, rather than one to two. This is because most user’s rowing strokes are too short and they do not finish off the rowing stroke (their knees bounce upwards and there is no rock over), and hence they row with a ‘ding dong’ effect.

Bad Ratio

Good Ratio

date:  Aug 21, 2017 comments:  Comments Off on Rhythm and Ratio
by:  [email protected] category:  Uncategorized Read More

Upper Body Movement

As the leg angle passes through 90 degrees the contribution of the legs lessens bio-mechanically. At this point the muscles of the upper body and torso are recruited to add to or maintain the acceleration initiated by the lower body. The transition between the two is made seamless by maintaining a flowing motion.

The hands are drawn into the body so that the forearms are horizontal. This is at about the height of the second bottom rib. The hands do not stop at the end of the drive, they flow back out and into the recovery phase, moving in and out from the body at a constant speed.

A common problem when rowing is stopping at the end of the drive. This encourages “two-piecing” of the stroke where the drive and recovery are two separate actions. “Two-piecing” often allows the rower to slump at the release position, encouraging poor posture. The rowing action needs to be smooth and seamless with each phase transitioning into the next.

Upperbody_highlighted
date:  Aug 21, 2017 comments:  Comments Off on Upper Body Movement
by:  [email protected] category:  Uncategorized Read More